Sunday, April 24, 2011

Panoramic Eggs

When I was little, some of my favorite stories were of secret doors, hiding places, and miniature worlds. At a time when no place was my own and just about everything was built for a person larger than me, nothing seemed more appealing than the tiny worlds inside panorama sugar eggs. So, since my introduction to confectionery about three years ago, I've been dying to make some.


For my first attempt, I wanted to create an Alice in Wonderland egg. Besides the obvious reference of traveling through the rabbit hole and other small spaces, both the books and panoramic eggs date back to Victorian England. In Through the Looking Glass, Alice also happens upon Humpty Dumpty, a classic egg character.


Sugar eggs are fairly easy to make. The "shell" is made by packing damp sugar into a mold, and then hollowing it after it has partially dried. I used vinegar instead of water so it would dry more quickly. The decorations are all piped in royal icing, except for the colored John Tenniel illustration which I printed on cardboard. I also had help from my boyfriend, Trevor, with Photoshopping out Alice so I could add her in separately.


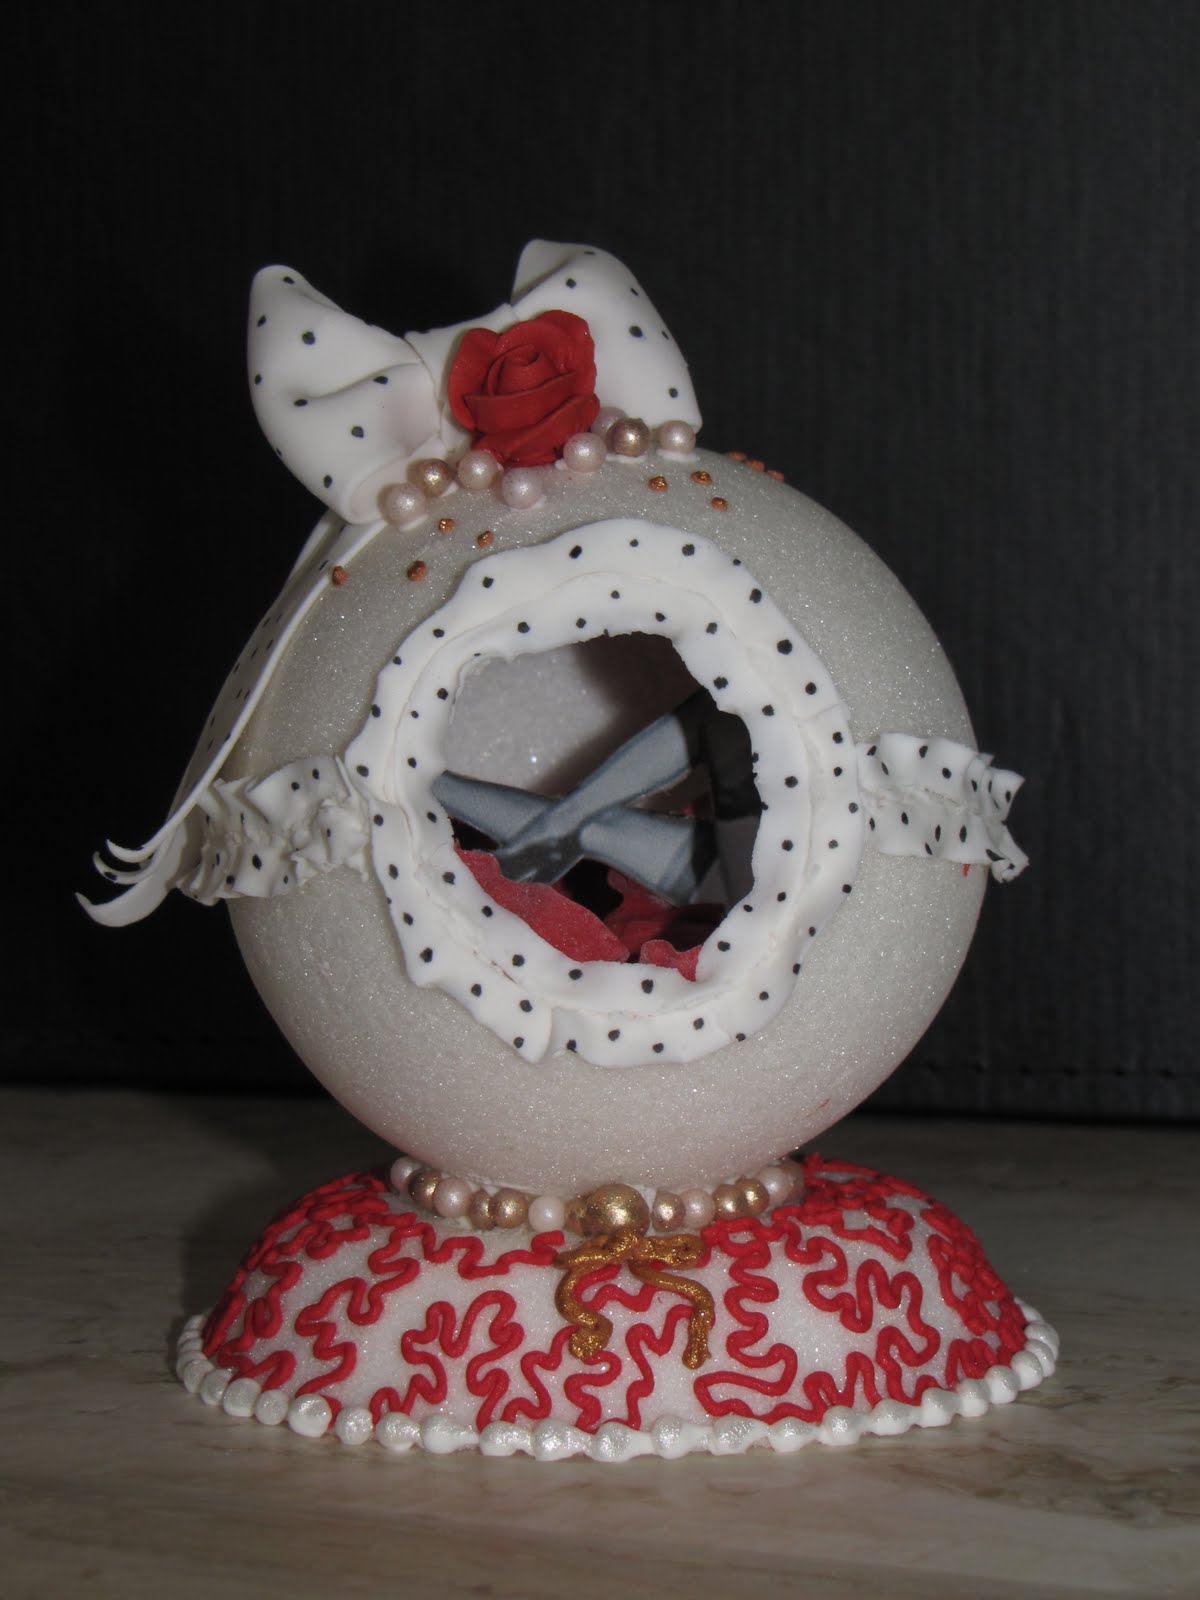
My second egg is a PG-13 rated "peep show". When you peer inside, there is a pile of red gumpaste ruffle with two sexy legs sticking out. The decorations are all edible (minus the legs) and are composed of royal icing, gumpaste, and dragee pearls.


I had a lot of fun making these eggs, and I feel like the design possibilities are endless. Please send me any ideas that you have (puns and conceptual ideas are encouraged) and I'll try to make them for next year.

Tuesday, January 4, 2011

Final Weeks at the French Pastry School


Sadly, l'Art du Gateau is finished. The last few weeks were a whirlwind, with a major sculpture project, planning of our final cakes, and preparing for graduation. Here are the photos of the fruits of our labor. Above is a little brush embroidery project that I did. Brush embroidery is a piping and painting technique that has a texture resembling stitches.


Our sculpted cake project was another design by chef instructor Scott Green. I affectionately call it the "orphan cake," because I read the trunk as more of a suitcase than a toy chest. The cake employed most of the techniques we learned throughout the semester, including airbrushing, pastillage, pulled and blown sugar, and on and on. Because there were so many components, we worked in partners and still finished barely in time. The cake was supported by a structure of flanges and PVC piping, and although not required, we decided to tilt our boat in mid-squall position to test the limits of our structure. Honestly, it was not as sound as we had hoped and we lost the mast halfway out the door.


For the sweet 16 project we again worked with partners but created our own designs. My partner, Heather, was an Egypt enthusiast and dreamed up the theme of Cleopatra's sweet 16. We wanted to tie in components that would appeal to a present day 16 year old, so we dolled up the gumpaste sphynx and painted hieroglyphics of manicures in the palace and shopping sprees at Neiman Marcus.


These last photos are of my final project. The criteria was to make a winter wedding cake that included a monogram and a gumpaste floral arrangement. I chose to do an Inuit themed cake using images inspired by Inuit artist Kenojuak Ashevak. I love her use of bold shapes and vibrant colors that still carry the chill of winter.


Each side of the cake featured a hand-cut and dusted sugar animal, including a fish, two birds, and two polar bears. The boarders were patterns taken from Inuit anoraks and the bottom tier had bas-relief flowers inspired by Ashevak's work. The cake topper was a bouquet of hand-modeled gumpaste pine cones and berries.

My next adventure will be creating cakes with Chicago's Take the Cake!